Friday, August 19, 2011

Beauty and the brocade

Taking a little girl to a fabric store is a lot like taking her to a candy shop.
Last month, I took Liz out to Jo-anns to buy fabric for Simplicity 3588 (PR review here), and let her pick out a fabric herself. I took her to the brocade section where she oohed and ahhed over practically all of it, but immediately liked the turquoise with lavender flowers best.
We shopped around for a bit, just to make sure, but she was very set on that brocade, and it was a very flattering color for her, so I went with it. I was very lucky to get the amount I needed for the dress for only $6.50! Heck, the invisible zipper cost almost half that much....

After nearly a month of working on it (and oodles of hand sewing!), I finally finished. Sewing with brocade for the first time was quite an adventure!

So here she is, my little beauty, wearing her new brocade outfit. :D


While at Jo-anns, we also got the matching piping, buttons, and some silky cording to make my own frog closure. Making that was an adventure!
I've only used piping once before, and so I was pretty happy with the outcome of the collar, cross bodice, and home-made frog-closure.


There is also piping around the sleeve bands, but I found it fairly easy to put in if I basted it in place first. Actually, I found this fabric so slippery to work with, I hand basted the majority of the seams together before machine sewing.


This fabric really was a nightmare, but also a good learning experience. It was very difficult to cut (I do plan on getting special scissors for this type of fabric sometime in the future), and also hard to sew, or even to handle! I think I should have gotten a manicure before starting on this, because I felt like I caused little snags in the fabric almost every time I handled it.
I was very nervous about how the hem would look, so I did a very careful catch stitch. I am pretty proud of the finished result! There is almost no sign of the stitching from the right side.
I added about 1" or so to the skirt length and to the bodice, so Liz could have some growing room, since she is in an upward growth spurt.


I hope that this dress will serve her as her very nicest dress, for holidays and birthday parties for the next year. I really do think the color is perfect for her hair and complexion, and it also really brings out her eyes.

I took some of the small dress scraps and made 2 matching Kanzashi blooms, which I attached to some simple hair clips. I also used the remaining buttons for the Kanzashi centers, which is a little bit Matchy-matchy I know, but also really cute I think.
The hair clips are so pretty, I think she will get quite a lot of use out of them with other outfits as well.


I think the pigtails with the hair clips, along with the Asian style dress, gives her a little anime look. Since she is so fond of Ponyo, The Last Airbender, and other kid's anime, I think it's a great look for her. Here she is showing off a little Wushu that her dad has been teaching her, she looks so serious! But she had a lot of fun modeling her new outfit, and I had a lot of fun making it and photographing her. :)


Sunday, August 7, 2011

Doll clothes, everything in miniature

Last holiday season, I really wanted to make Liz some clothes for her dolls. She had 2 11-1/2" dolls, both of the Disney Princess variety, and that was the only clothing either doll had.

I decided to make each doll a nightgown and a day dress. I also wanted to make some accessories,if I could. My friend Sheila had recently sent me a number of doll patterns, and I selected Simplicity 9334 (my PR review here), an OOP pattern with lots of cute outfits.


I used satin lining fabric, and also old satin pillowcases to make the 2 nightgowns and the matching nightrobe. I was very lucky to find this beautiful white and gold lace trim for the white nightgown, so it has a wedding gown sort of look to it. My blue lace didn't have ribbon in it for the gown straps, so I had to sew some matching ribbon onto the lace myself.
I admit, I had a lot of fun posing the dolls in the dollhouse for the pictures, probably more fun than someone my age ought to have with Barbie dolls. Haha. :)


I thought the flounced dress was the cutest dress in the package, so I decided to do that one next. Wow, that one is harder to make than it looks! I took extra pains to make sure the fabric pattern lined up. Hemming the circle skirt flounces and sleeves was almost nightmarish, but totally worth it when finished.
I decided to try the coat, skirt, top in view 5 as well. Although it turned out really super nice looking, in hindsight I should have realized that a 3.5 year old wouldn't be very excited by a drab grey wool suit....
The red satin top is again a pillowcase, with the rosebud straps being some leftover trim from a apron I made for my MiL.
I also made a matching bag for each outfit. Black with silver sparkle quilting cotton (remnants of my bellydance costume), with a very pretty silver button and some trim I found that I thought was an awesomely perfect match for the handles. And yes, the pale pastel bag turned out cute, too. :)
And the best thing is they are actually function as bags!
My daughter LOVES these working bags; the dolls can go shopping, and carry little coins or items in the bags.


Oh, and here is the outfit with the wool coat, and the felt button belt as well.
I swear, her barbies are now better dressed than I am....

But as I said, I realized that the a-line skirt and coat might not be too exciting to my daughter, but the red top was super cute, so I thought I'd try another outfit with the same top.


I decided to try the "poodle skirt", view 6. As I didn't have a poodle applique (And didn't intend to make the matching accessories), I just used the rest of the rosebud trim so it matched the top's straps.

Again I used a wool remnant, so it is kind of stiff, not drapey. But that is not a bad thing, it gives it the look of the proper 50's undergarments...

To me, it looks like something right out of the Donna Reed Show, very 50's/early 60's.


The following spring, PR had a Look Alike contest, and I thought I'd make Liz a dress, and a matching doll dress as well.
I selected Simplicity 9838 (PR review) for the doll dress. I thought Liz's dress really resembled a German dirndle apron over a dress, and this pattern allowed me to try and replicate that.

Liz's dress is McCall's 6062 (PR review). It turns out to be the dress she requests to wear most often of all the dreses I've made her. It is very colorful, and comfortable. An excellent pattern if you can find enough contrasting/matching fabrics! lol
And because it has elastic in the neckline and a tie back, it has lots of growing room!


I do hope to make more doll clothing in the future. It is far more work than it appears. Everything has to be very precise on such tiny clothing, and the hemming alone is cringeworthy, but the results are well worth the effort. And I have to admit, it's kind quite a lot of fun, too.
I have 3 other unused doll clothing patterns. This coming holiday season, expect 4 or 5 new Barbie outfits!

Tuesday, August 2, 2011

Unconventional Materials and "The Paper Bag Princess"

The newest PR 2 week contest-challenge is sewing with unconventional materials, which basically means anything except fabric. Here is a quick preview of the dress Liz painted and decorated! And here is the PR review, as well.


When this contest was first announced, I though "Haha, I saw that challenge on Project Runway! But I don't think I can do something like that." And I tried to dismiss it from my mind, and focus on the brocade dress for Liz.

I was only partially successful, as I got the brocade dress and lining cut, and started working on the stay stitching, it turned out my cheapo universal needles caused runs in the brocade! :( Booo....
So I decided to work on the lining, but in the meantime, my mind kept returning to strange things I might be able to make clothes out of. I didn't want to buy anything for this project, so I was wondering around the house, randomly looking in cupboards. I had the standard white plastic trash bags, but no black ones. I considered those briefly, but dismissed them. Outside we have a willow tree, and the very pliable branches had me thinking about something small entirely out of plants, such as a woven hat or crown, but that would be too hard. I don't weave....

Under the sink though, I had 3 very sturdy paper bags, the kind with handles. An idea popped into my mind. We could make something like the children's book "The Papaer Bag Princess", only have it decorated, as if nature got all over her paper bag dress during her adventures.
Liz just LOVES to color and paint. If she could decorate a dress herself, and I could simply construct it, that would be so much fun! A great project for us to work on together.

Liz is always collecting pretty leaves, small flowers, etc on her walks outside. Paint some pretty bugs and flowers, add a little Elmers glue combined with her "collection", and voila; art! Or so I hoped.

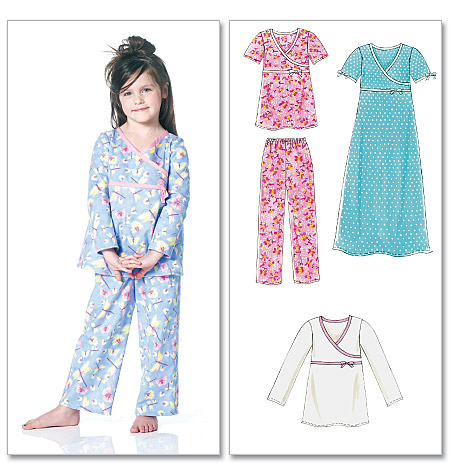
I went through my kids patterns over and over, but nothing was simple enough in my mind, nothing seemed like it would work well for a project like this. But about 1/2 of my kids patterns are PJ's, and it suddenly occurred to me I could use on of those might be perfect. Easy, simple, cute, I finally decided to use McCall's 6189.
Sleeveless, it is only 3 pattern pieces, 4 pieces cut (the bodice is mirrored).


On the 1st, I carefully cut open the paper bags. The pieces weren't wide enough to cut the front or back pieces on the fold, so I had to create CF and CB seams, to which I forgot to create a seam allowance....argh. I just had to make the side seams narrower to compensate.
This is where I discovered that sewing paper together is a lot like perforating it. :/
I ended using masking tape on the inside of each seam, to reinforce them and also to cover up the sharp edges that might cause a paper cut.

After I created the 4 main pieces, the next step was to draw something on them that Liz could paint in.

Liz was super excited by this time, at the idea of helping to create her own dress. She helped select the motifs to decorate her dress: a couple of butterflies, a ladybug, a dragonfly, and a few flowers. I cut each one of these out, so I could trace them on the dress multiple times. She then spent about an hour a day for 3 days painting them in, and I helped out as well. She really enjoyed painting with her Crayola paints, though the pink is acrylic.

She's a very talented little painter, and good at staying inside the lines, and following patterns.
After we finished painting the dress pieces, she mentioned she wanted to put glitter glue on the dress. What a brilliant little girl! So we added glitter glue to parts of the dress, as well.


After everything was thoroughly dry, I went ahead and finished the basic dress construction. The contest committee agreed to allow in basic notions such as trim and bias tape, so I was able to safely and attractively cover the sharp edges around the neck and armholes. Luckily, I had a whole package of dark red double fold bias tape in my stash, and I thought it was a perfect color for this dress!


At this point, I sewed up the side seams, and then I realized how hard it was going to be to turn the dress (basically a stiff paper tube) right side out. Holy cow, I wrinkled the heck out of it, and at times I wasn't sure I was going to be able to do it intact, but I managed not to tear it!

Then I tried it on Liz...and it was impossible to get over her head. Grrr....
Ah, but easy fix came to me after a little thinking. I cut a 2.5" slit along the CB seam, and added a pretty little red button and a ribbon button loop closure. And, now she could get it over her head, hurray!


Our last task was to add our natural decorations. As I mentioned earlier, Liz loves to collect little things while she is outside, so we took a fun long walk in the park, collecting only fallen leaves that we liked. I told her we'd pick the flowers out of our own yard the day we took pictures of the dress, so they wouldn't wilt.

We glued already fallen leaves and some fallen lily petals all around the hemline of the dress, and randomly around the front piece of the dress as well.


Liz also has a little collection of small craft gems her grandpa got for her, and she selected a deep blue one with black veining to sit on the golden maple leaf we had found, as a sort of broach, where the bow on the pattern normally sits.


Lastly we added a few little fresh flowers. Just one pansy and a couple of tiny yellow buttercups.


So, here it is, the "Paper Bag Princess" dress!

I must say for a dress made of paper bags, Crayola paint, and fallen plant matter, I am very happy, it is pretty darn cute.


The best part was sharing the work with Liz, she really enjoyed being a part of making this dress, and is really proud of her work.

Now that we are done, she gets to keep it hanging in her room as wall art, a reminder of how SHE helped make her own dress. :)


She really wanted to spend time showing it off, and also enjoyed an excuse to wear her "Dorathy Gale" sparkly red shoes. :)
Liz managed to move around in it pretty well! She certainly had fun making and wearing this dress.


Monday, July 25, 2011

A whole new home, in less than 7 days!

It has been a whirlwind week! Last Monday, we decided we needed to move. This was due to a whole host of issues, but the deciding factor was that James has decided to go back to college and work on getting his degree. None of the colleges in our small coastal town offered computer courses, so it was back to the big city! Well, near a big city anyway. :)

We decided to see what the rental market looked like, so on Tuesday we hopped in the car and drove 3 hours to Albany, Or., with rental list and phone numbers in hand. We liked 2 places, and so we applied to both. Surprisingly, Wednesday morning, the place we liked best called and said we were approved (that was FAST!)
We went ahead and put in our 30 day notice at the current place. The landlord said if we moved before the 1st of August, we wouldn't have to pay any money for next month pro-rated at ALL! So that saved us about $350 if we moved within a week or so.

Thursday we came back to Albany and signed all the paperwork and payed the move-in fees and got our keys, and reserved a U-haul for Saturday. Friday we packed the whole house, it was near nonstop packing all day until bedtime.
Saturday my dad came up in the morning, and helped load the U-haul. He couldn't stay for the unloading though, so we drove the 3+ hours to Albany, got here around 5 pm, and James and I unloaded everything ourselves Saturday evening. Poor Liz was bored stiff during the loading, and miserably hot in the car with me on the drive down, but she got to go and play outside in the new fenced yard while we unloaded, so that helped. :)
We got most of the house unpacked and put away Saturday by about midnight, and I went to bed. Sunday, we unpacked everything else, and James even got all the pictures hung up. Today, we took the U-haul back, and got all of the utilities transferred and set up. What a week!!!

And so, please take a brief tour with me of our new place. First, Liz's room:

I managed to finish sewing up some lovely curtains last night as well. My friend Jillian had sent these to me mostly sewn up. I just had to even them out in size, finish the edges, and hem the bottoms. We don't have a curtain rod yet, but will get one this week sometime.
I like them so much, I'm trying to figure out how to get curtains for the living room, now. They really improve the look of a room.

Next up, our room. It's pretty sparse, since we don't spend much time in there. I think we need a few posters, just so it doesn't look so much like a monastic cell, lol.


We do have the most gorgeous closets, though. Mirrored, and 2 full closets! No more fighting for closet space. :)

Honestly, these pictures make the living room look downright cluttered, but it is so open and spacious! There is a good 6 feet of empty room between the TV (not pictured, it is off to the left) and the couch. And for the first time in ages, all of our books have are on a bookshelf, and all of my Disney figurines are out. James made his little nook in the corner, books and computer ready for college!

Oh, and let us not forget...the gas fireplace. Not that we'll need it anytime soon, lol, but this winter, I know it'll be a wonderful thing. :)

Looking at our decor, I realize we are a bit eclectic. Also not pictured are the large medieval paintings and the beautiful tapestry of Ireland, but you can see we have some Asian influence, and quite a lot of celtic and medieval, with a touch of Africa (the drums) and even a bit of Native American, with a sprinkling of Disney, lol.

And for the first time since we were married, we have a real dining area! So our nice but tiny dining table has a place. Of course, I was sewing on it the night before, but it cleans up easily and quickly for dinner.

Clearly, this will serve not only as dining room but as my sewing area, as well as a play area for Liz. She loves her toy kitchen, so she can play there while I sew.
I am happy to have my 1954 antique dress form out on display, as well as in a great place for actual sewing use and for pictures. The sliding glass door gives great light, and there is a LOT of room on the dining floor for laying out and cutting. Not a true sewing room, but it'll work well.

We do need some dining chairs though, for when I'm NOT sewing in here, but that'll come after the washer/dryer. :)
Oh and look, we have a ceiling fan!

There is a mirrored closet in the hallway with the water heater tucked back inside it, but someone installed shelves on the right half. Since there is a linen closet with plenty of space inside the bathroom itself, I actually got this closet to unpack and organize (sort of) my fabric and other sewing things!

So this is all of my fabric stash, it's pretty decent. The 7 largest pieces are sheets, but they are all nice ones (except one which will be used as muslin). I also have 8 pillowcases in there, which I can use as accents or smaller things for Liz. A large portion of the nicer fabrics here were gifts to me from my mother in law, and from 2 other very generous people who have become good on-line friends. :)

As I organized everything by color, I realized I have almost as much blue fabric as all the other colors (baring whites/browns/tans, which I also have a lot of) combined. As you can see the red, orange, yellow and pink is all stacked together, with only 1 or 2 pieces of each of those colors. I guess it's pretty clear my color preference leans towards the blue/green purple end of the spectrum.


At any rate, I also got my notions, iron, all my sewing books, crochet box, and my patterns (in the file box on the lower left), all in the same space. I have never had everything unpacked and easy to get at and go through. I love it already!!

I sort of skipped over the kitchen, but it is big and lovely. Lots of storage, tons of counter space, and a stove that I'm guessing is as old as I am! lol. It's a GE, and it works great, I think it is at least 30 years old, and it adds character to the place. I love old stoves, I do not know why.
Last but most certainly not least, here is the little fenced yard. It isn't huge, but it's big enough for plenty of plants, and outdoor dining. The cat just LOVES the chance to get outside. James made sure there were no cracks he could ninja through, so it is nice and safe. Also, Liz is enjoying having a place to go outside and play. Another thing on our list, an outdoor toy for Liz. For now though, it a nice place to sit in the evening when the heat starts to die down.

There are a lot of trees all around the condo's, so the entire area is very shaded all day long. It's such a beautiful neighborhood. There is a nice children's park close-by, a grade school, and not too far away a whole host of shopping. You have no idea having lived on the coast for years, having a Safeway and a variety of other shops (including a large Jo-anns!)just 2 miles away is amazing! :D

Well, it's been a rough, busy week. but we really love our new place. It really feels more like a home instead of just a crummy apartment. I hope we get to stay here through all of James' schooling. I hope my disability benefits aren't cut next week. :/ I'm scared and elated, and basically exhausted. Time for a few days rest, then back to sewing. Next up, one of the nicest fabrics I've ever sewn, the turquoise brocade dress for Liz.

Monday, July 18, 2011

Picking flowers....on the way to a Star Trek Convention?


Have you ever sewn something that you really like, but that looks nothing like you expected it to?
I just finished making Simplicity 3588 for my daughter, out of the same -nightmare to work with- pale gold poly charmeuse as I made my beaded top.

Most people make their little girl's clothing bright and colorful with pretty prints. And I usually do too! I have a beautiful turquoise and lavender brocade sitting ready to make a second version of this dress. But, I wanted to do a trial run before cutting the brocade, and my daughter begged me to make her first dress out of this fabric. I think she likes it so much because it is so shiny and soft, it feels like liquid gold, very fluid to the touch, nice on the skin.


So I took her to Jo-anns with me and let her pick out the buttons. I also decided to add the black piping around the collar and bodice, as in view B of this pattern, to give the pale fabric a little definition. The interesting result of this seems to me that she looks a bit like she's going to a Star Trek Convention. :D Lt. Liz reporting for duty!


Of course, she thinks it looks like a Kung Fu dress (and so does daddy!)
When we went outside to pick flowers and take pictures, it was very windy. Ahh, the Oregon coast....


Anyway, since she just loves Avatar, the Last Airbender (the cartoon series, not the movie), she decided to show me how she was Air Bending the wind! lol

Ah, I remember what it was like to pretend to have super powers. And to have such an imagination. :)


As usual, she just adores having her picture taken. I hate to admit it, but lately she's been watching re-runs of Project Runway with me (I sincerely hope she never wants to be a model! but I love the clothes on that show.) She decided to show me her "project runway" pose, which was pretty good!


On a side note, I spent the last of my sewing allowance for this month to buy her those black dress shoes. Amazing that she didn't own any! Her only dress shoes are Dorothy Gale red. I was so lucky, Payless shoes was having a big sale, so I got these cute little shoes, normally 14.99 for only 4.49! Now that's a good shoe bargain. :)
Liz really likes the shoes and the dress, and I had a hard time getting her to take them off to eat when we got back inside for snack time. She didn't even want to go inside, it was such a beautiful day out today. But after about an hour of picking flowers and taking pictures, and just walking around the neighborhood, she was getting hungry. So finally, we went back in to have some fresh strawberries and milk.


In conclusion, I love this pattern. It was difficult to sew this fabric (haha, understatement of the year! It was like trying to sew with wet eels. Pins people. The key is lot and LOTS of pins!!), and the pattern itself isn't for beginners either. In the end it was really worth it, though.
Certainly, the dress is a bit...monochrome, but it will be a nice school dress for the fall, I think. Pretty, but not too showy. Oh, and I adore the bell sleeves with the little gather near the bicep! Very good design element.

I may or may not enter this into the Sewing for Children Contest on PR. I have at least 2 more things I want to sew for Liz, and instead of many entries and hoping for the random prize, I'd really like to put up my best entry and see if I can actually get some votes! It would be nice to make something really, really nice and see it come in the top 5. :)

I think this pattern will be one I make and remake many times as she grows, as it will look just as nice on a 6 or an 8 year old. So this one is a keeper for sure!

Sunday, July 10, 2011

The devil is in the details!

Oh, the weather has been beautiful the last few days! So we've been out a bit more than usual, which means less sewing time. It's a good trade though, I want to enjoy what little sun we get!

I started on my One Pattern Many Looks contest project this week. I posted the fabrics and beads I had in mind a few weeks ago, and I decided to start on the metalic silky charmeuse fabric. I have quite a lot of it, so I could recut a piece if something went wrong. I'm glad I chose to use this fabric first!

Reading a lot of the previous reviews of McCalls 5388, it is repeatedly noted that this pattern runs VERY large. The common recommendation is to go down 3 full sizes and ALSO pinch another inch or so out of the yoke. I was a bit skeptical of this, especially after looking at the finished garment measurements. I'm a 36 bust and usually cut a 12, which meant I should cut a 6. The finished measurement on the size 6 was 41", that's not a lot of ease for a "loose" top. I went ahead and cut the top at a 6, basted it together, and found it was indeed a tad more snug than what I'd find comfortable. I set it aside for about a week, not even sure now if I liked the style, and finished my picnic shirt instead.

It was sitting on my sewing form this whole time, and the color, texture and drape of the fabric and pattern were so pretty, I really wanted to salvage it. I tested it with minimal seam allowance (1/4" most places, 1/8" sleeves), and the fit was quite good! What a pleasant surprise.

With that all worked out, I went ahead and started laying out a design for the beadwork. I decided early on to use a celtic knot design, something that I could curve and taper off near the shoulders. I settled pretty quickly onto a design. Here it is finished.


I realized the fabric was far too lightweight to hold the extensive beadwork I planned, so I dug out some interfacing I had from Jo-anns from their 1/2 off remnant bin marked "featherweight". Let me tell you, it isn't light or featherweight, it is clearly a medium weight interfacing, and made the yoke a tad stiff. Still, I had nothing else, and it wasn't bad, so I proceeded.

To create the design, I first drew it right on my traced pattern piece. Then I laid that over the interfaced yoke, and transferred it to the best of my ability right onto the interfacing. I have to say the interfacing made a great guide to follow while actually beading!
Having never actually beaded directly onto fabric before, I had some advice and a quick lesson from a friend. She told me to go 2 or 3 beads forward, then stitch backward 1 or 2 beads. Since my beads are a size larger than standard seed beads, I only did 2 at a time, and I went back through both on every stitch, so this was a LOT of hand sewing. I took me about 8 or 10 hours total, and although my beading is slightly uneven in places, I am pleased with the finished look. It's something I'd like to try more of in the future.


I thought this fabric would look pretty bad with a machine sewn hem, so I attempted my first real hand rolled hems. I did both sleeves, as well as the bottom hem. This took me another 5 hours of hand sewing.

Although it is very labor intensive, I think all the hand sewing is really worth it. The way the hem hangs looks good and natural, not stiff or flat like I was afraid it would if machine sewn.


Here are a couple of shots showing the finished garment, inside and out. I would like to point out that I used french seams, despite my narrow seam allowance. This meant 1/8" seams, trimmed to 1/16" and then another 1/8" for the finished seam (total = 1/4"). I NEVER used the foot petal while sewing this top, what little of it is machine sewn is all hand cranked, since I was using such small seam allowances. I also carefully topstitched the neck opening, which gives the top an almost quilted look.

I was a bit desperate and pinked the armhole seam, but I am still very proud of how the top looks inside-out. Since the beading is all on the front yoke, the yoke facing covers it. And the hems just look neat :) I think this top is really fun and creative, something I can wear out daytime or evenings, a bit dressy, but also a tad rock-n-roll.

Sadly, I think this will be "dry clean only"! lol


Next, I wanted to make my black and white version.


I had the most interesting remnant with a bit of boarder print on it. It is very drapey, but there wasn't enough of it to make a full top. It was about the size of my coffee table.

I had to cut creatively to get the top out of this. I had just enough left in the middle to use for the bias strips I planned on using.


I think the sleeves are a bit too puffy with the elastic in them. I prefer the way they hang and feel on the gold beaded top. If I make this again, I'll leave out the elastic.
I am very glad I used the black bias strips on the neckline, and for the elastic casing on the sleeves. It gives the top a lot more definition.


I'm happy that I found a good use for this pretty piece of boarder fabric. :D

I hope to get some pictures of myself wearing both of these sometime later this week, and I'll add those as soon as I get them taken.

I may make this top one or possibly even 2 more times for the contest. I have a purple knit jersey I think would work well with some fabric flowers near the shoulder. I also have some sky blue striped fabric I think might look interesting with ruffles on the hem, sleeves, and center of the yoke with some buttons. The problem I'm having is that I'm not sure how much I actually like the look of these 2 tops wearing them. They are very loose, and have no waist definition, and I'm afraid they look a bit like maternity wear. I am going to wear them both out and about a few times in the next week before I decide if I'm going to make more or not.

Until next time, happy sewing everyone!

Thursday, July 7, 2011

Perfect picnic shirt

Well, I've just finished sewing up McCall's 6035 for the second time, this time view D. I like this one even more than my first try (view B). The fabric is this pretty green checked cotton, very nice shirting material. I've had it in my stash for probably close to 2 years.


The sleeve pieces are a very unusual shape, kind of like J's. But I love the finished sleeve. It's very cute, but still long enough to be warm, and the ties aren't too long or ridiculous.


I was about 9" short of the required fabric yardage, so I had to be very creative in cutting the sleeve back pieces. I also didn't have enough fabric to cut the ties, so I used a green floral print that I thought matched pretty well.

I had to size the lower half of the pattern up a bit, and the fit seems pretty good, not too snug, not baggy.

I am so happy I made this, it really was perfect for a picnic! I came close to putting this off yet again, but I'm really glad I took the time. I'm now trying to decide if others of my stash fabric are appropriate to make another one!


I think the buttons I found were really a cute addition. Pale yellow flowers. I didn't add the top button on the collar, as the buttons came in packages of 3, so it was easier to buy 6 than 7 (as the pattern uses).


I got this sewn up on the 3rd, so I actually got to wear it to the 4th of July picnic our friends had. We had a really great time. Their DD's birthday is the 4th, and their second child the 14th, so they combined it into a big birthday bash plus fireworks. Loads of fun! Liz had a really wonderful time, well we all did really. It was quite a long day, we didn't get home until 9. We didn't go see the big fireworks on the waterfront, Liz was just too worn out. I'm sure she'll be big enough to go next year. :)
Here is Liz with her friend Yana, and the little sister, Indigo. They all look so serious in this shot, but it was the only pic I got with all 3 of them in it. Maybe they were just serious about those hot dogs they were about to eat! lol